How to Prep Your Comic for Print
A step-by-step guide to using comicprint to ensure your files are ready for physical production.
Why does this matter?
Commercial printers require your files to be set up in a very specific way. If your pages don't have enough "bleed" (extra artwork on the edges) or if text is too close to the edge, you risk white slivers on your pages or text getting chopped off. This tool automates checking for those issues.
1Getting Started
Open the editor and drag your comic pages directly onto the browser window. We support PNG and JPG files. You can upload them all at once or one by one.
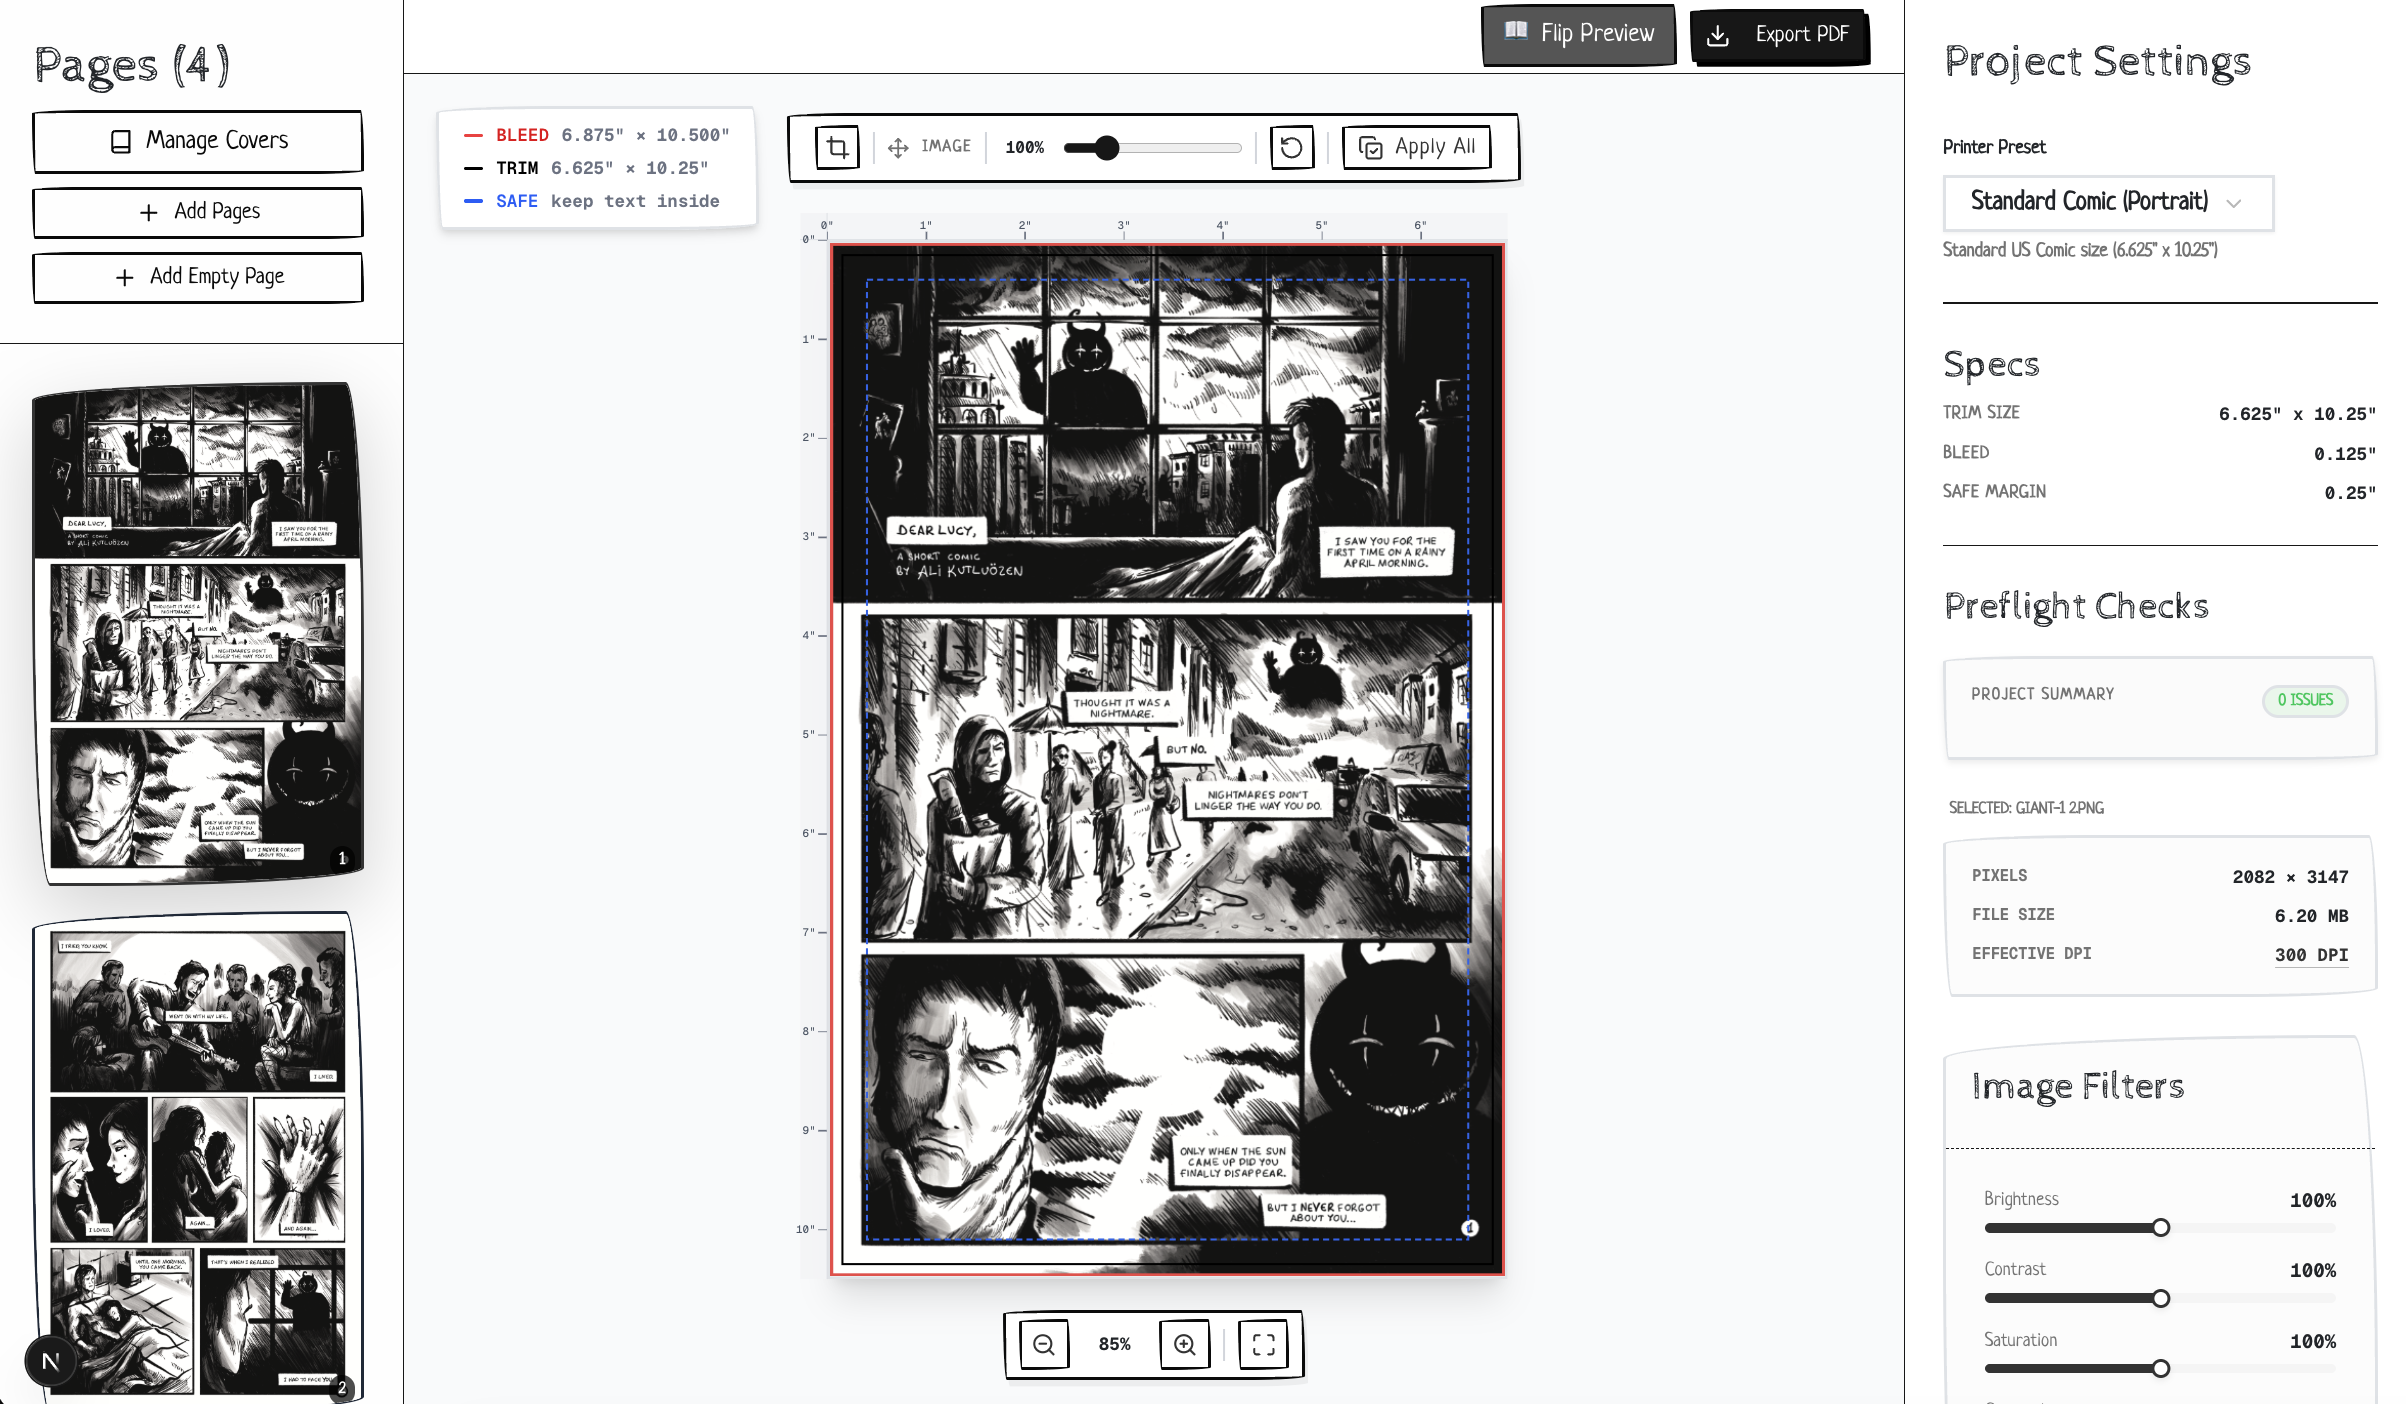
The main editor view where you organize pages and check for issues.
Once uploaded, select your Target Preset from the right sidebar.
Standard Comic
Traditional US comic size. Trim size is usually 6.625" x 10.25".
Manga / Digest
Smaller format, typically around 5" x 7.5" or 5.5" x 8.5".
2Fixing Common Issues
After uploading, you might see yellow or red badges on your pages. Click on a page to see details in the right sidebar.
Aspect Ratio & Bleed
If your art doesn't perfectly match the shape of the print preset (including bleed), you'll see a warning.
The Solution:
In the validation panel, you'll see a button labeled "Accept Crop & Dismiss".
Clicking this tells usage you're okay with us slightly zooming/cropping your image to make it fill the page perfectly. We center-crop by default, ensuring no white edges appear in print.
Resolution (DPI)
Print requires high resolution (usually 300 DPI or higher). Since screens are lower resolution, an image that looks big on your monitor might be too small for print.
If you see a Low DPI warning, it means your source image pixel dimensions are too small for the selected physical size. The only fix is to upload a higher-resolution version of your page.
Color Adjustments & Filters
Sometimes your scanned art or digital exports come out too dark, muddy, or you just want a quick black-and-white conversion.
Click any page and use the Image Adjustments panel in the right sidebar. You can tweak brightness, contrast, and saturation, or apply Grayscale and Sepia filters. Click Apply All to instantly grade your entire book at once!
3Double Page Spreads
If your comic features wide, sweeping art that spans across two pages, comicprint handles it automatically. Toggle the Double Page Spread View at the top of the editor.
- Pre-joined Spreads: If you upload a single, extra-wide image file (e.g.,
spread_2_3.jpg), the editor detects its aspect ratio and automatically splits it across two facing pages in the layout. - Individual Pages: If you upload
page_2.jpgandpage_3.jpgseparately, spread mode stitches them together seamlessly down the fold line so you can preview the connected art.
4Covers
Standard comics have 4 cover slots. You can manage these separately from your interior pages by clicking the Manage Covers button in the left sidebar.
- Front CoverThe exterior front of the book.
- Inside FrontThe interior side of the front cover.
- Inside BackThe interior side of the back cover.
- Back CoverThe exterior back of the book.
5Exporting PDF
When you're ready, click Export PDF from the right sidebar. You'll be presented with several powerful options tailored for different commercial printers.
Export Format & Layout
- Single PDF File: Joins all your processed pages into one continuous document. Perfect for digital distribution (Gumroad, Itch.io) or proofing.
- Individual PDFs (ZIP): Generates independent files mapped to a naming convention (e.g.,
page_01.pdf). This is explicitly required by many high-end offset printers. - Split Spreads: If you built your book using Double Page Spreads, this option mathematically halves the wide images down the gutter and exports them as individual single pages, guaranteeing bleed accuracy on both halves.
Color Profiles
- Standard RGB: Maintains your original color values. Best for digital releases or modern print-on-demand services (like Amazon KDP) that prefer converting RGB on their own presses.
- CMYK Prep (Approximation): Forces the PDF's output intent profile to CMYK SWOP. Use this if your commercial printer specifically requests a CMYK-tagged file. (Note: True color shifting requires professional RIP software, but this ensures file compliance).
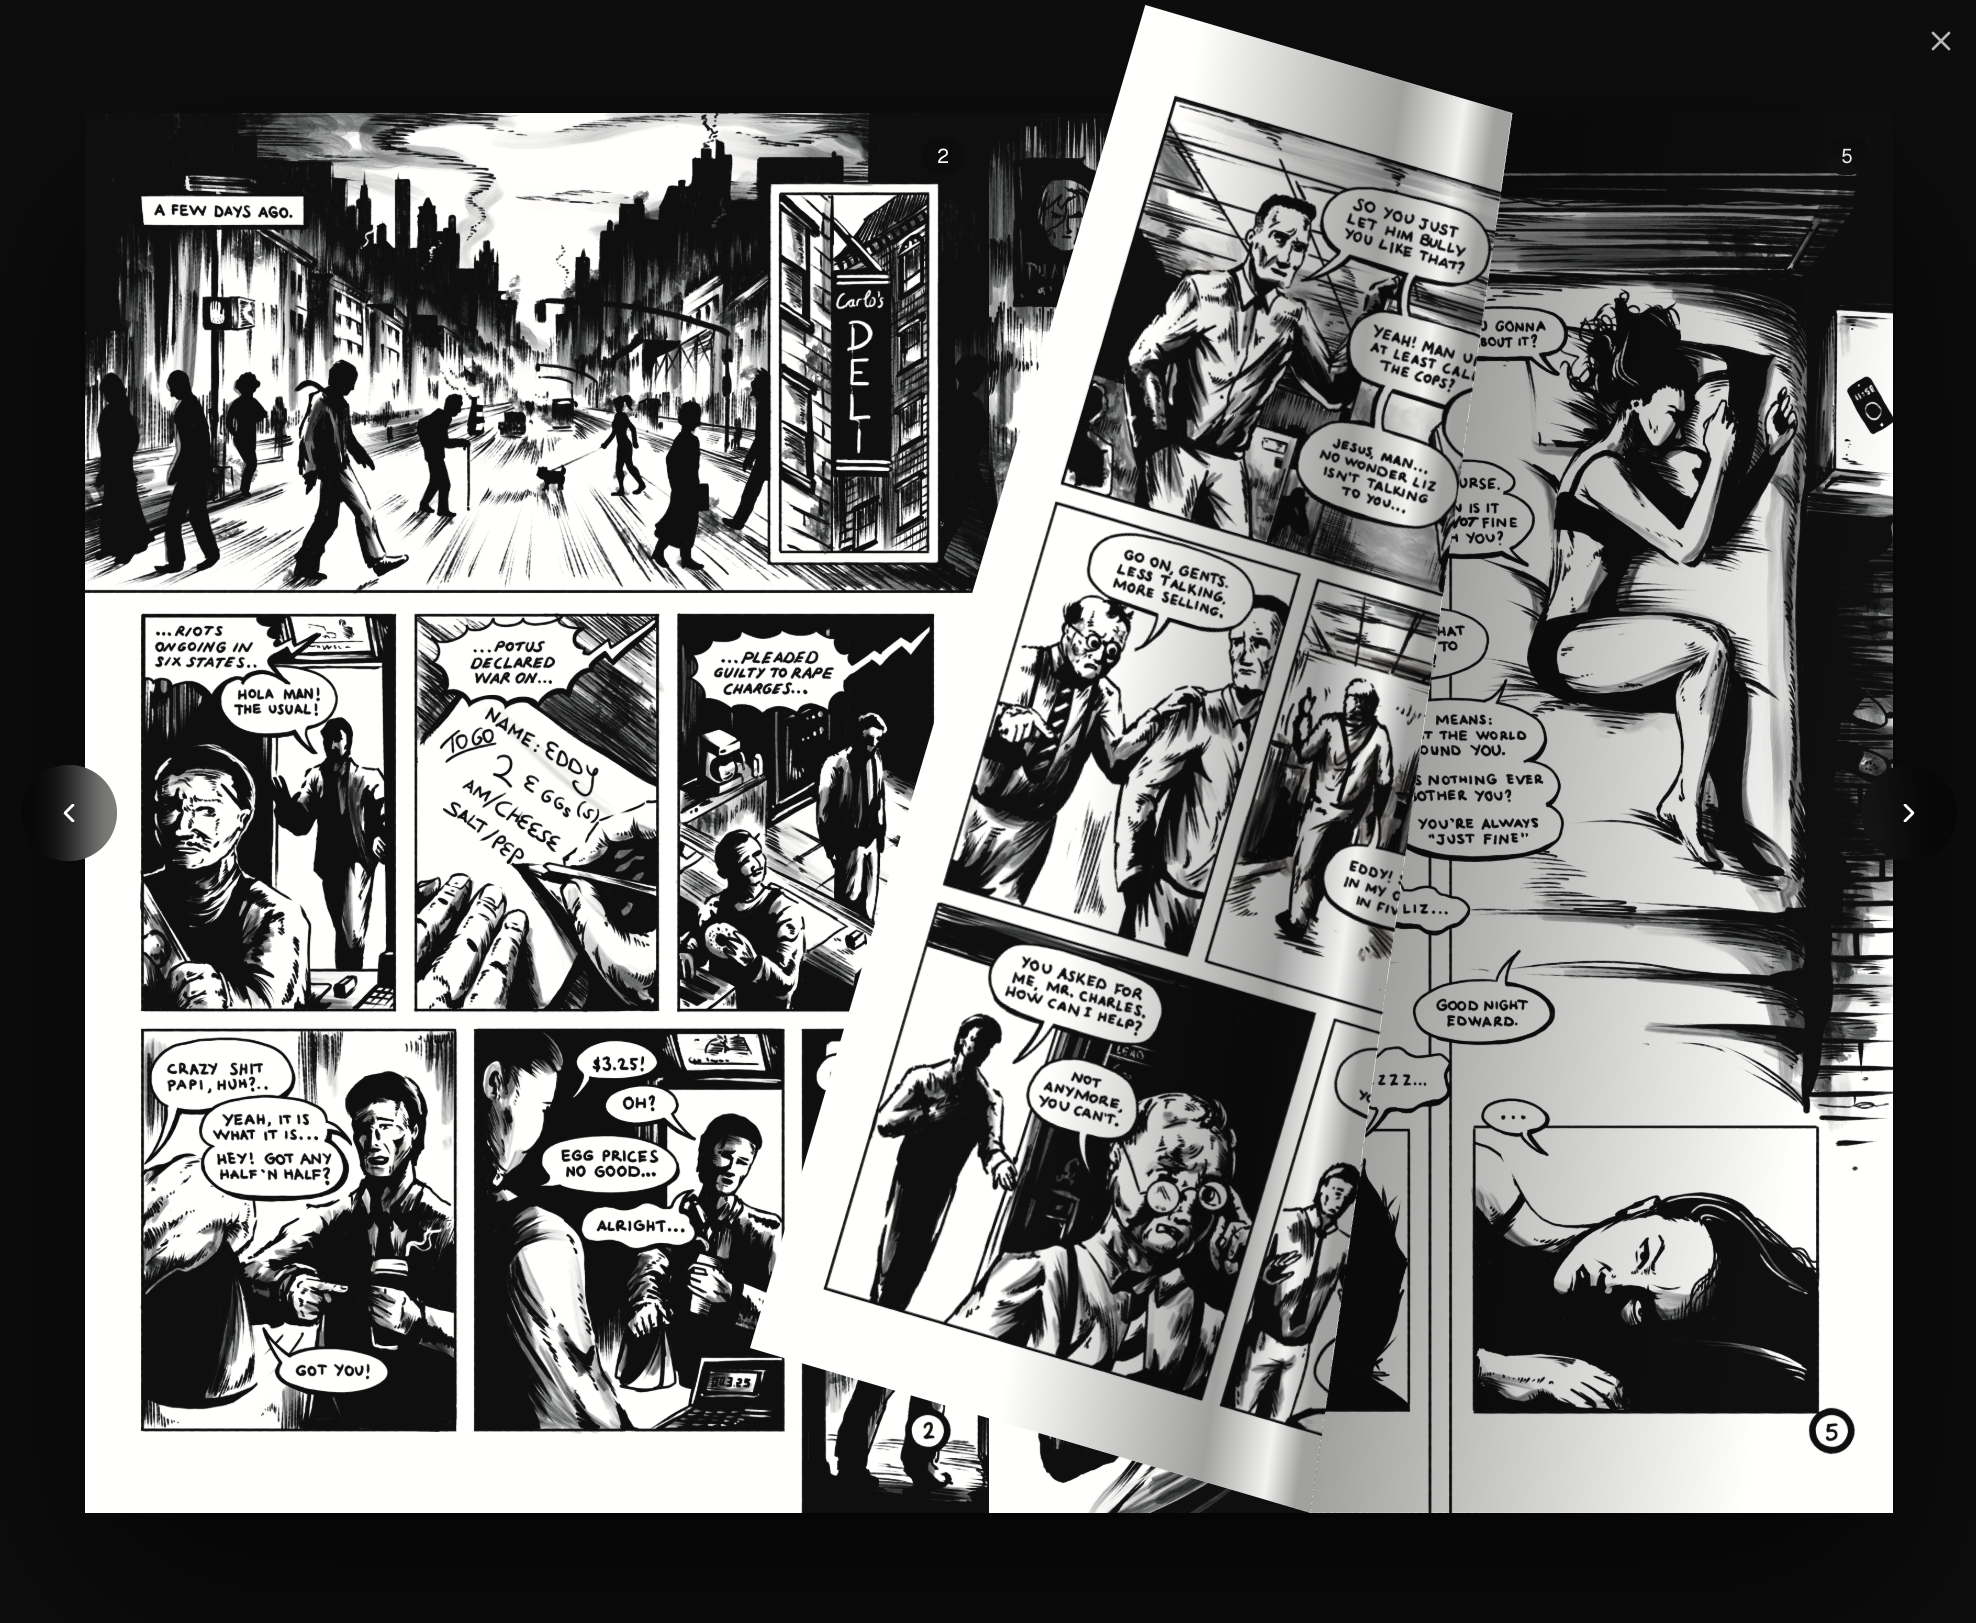
Preview mode shows you exactly how your pages will look printed.
Ready to start?
Jump into the editor now. No signup required, and your files stay on your device.
Launch Editor